
THIS POST INCLUDES:
1. What is Visual Journaling
2. Day 1: Setting the Foundation
3. Day 2: Exploring Emotions
4. Day 3: Shapes and Symbols
5. Day 4: Texture
6. Day 5: Collage
7. Day 6: Self-Reflection
8. Day 7: Wrapping it Up
9. Free Download Exercise – 7 Day Journaling Plan
WHAT IS VISUAL JOURNALING
Visual journaling is a creative and introspective practice that involves the use of visual elements, such as drawings, paintings, collages, and other artistic expressions, within a personal journal format. It serves as a means of self-exploration, reflection, and communication, allowing individuals to visually capture their thoughts, emotions, and experiences. Through the combination of imagery and written content, visual journaling provides a unique and holistic avenue for individuals to delve into their inner thoughts, process emotions, and document their personal journeys. This therapeutic technique is often utilized in various settings, including art therapy, to promote self-discovery, emotional well-being, and the development of a visual narrative that reflects one’s internal landscape.
Importance in art therapy
Visual journaling holds significant importance in the realm of art therapy for several reasons:1. Expressive Outlet: Visual journaling provides individuals with a non-verbal means of expression, allowing them to communicate thoughts and emotions that may be challenging to articulate verbally.
1. Expressive Outlet: Visual journaling provides individuals with a non-verbal means of expression, allowing them to communicate thoughts and emotions that may be challenging to articulate verbally.
2. Self-Exploration and Reflection: Through the creation of visual entries, individuals engage in a process of self-exploration, gaining insights into their emotions, experiences, and personal narratives.
3. Integration of Art and Psychology: Art therapy recognizes the interconnection between artistic expression and psychological well-being. Visual journaling seamlessly merges these elements, fostering a holistic approach to self-discovery and healing.
4. Symbolic Representation: Symbols and images used in visual journaling often carry personal significance. Art therapists can work with individuals to explore the symbolism in their creations, facilitating a deeper understanding of their inner worlds.
5. Therapeutic Process: Engaging in a structured visual journaling practice can serve as a therapeutic process, promoting mindfulness and self-awareness. It allows individuals to be present in the moment and connect with their thoughts and feelings.
6. Encourages Creativity and Play: Visual journaling encourages a playful and creative approach to self-expression. This can be particularly beneficial for individuals who may find traditional verbal therapy methods less engaging.
7. Documentation of Progress: The visual journal serves as a tangible record of an individual’s progress over time. Reviewing past entries provides a visual narrative of growth, challenges, and achievements.
8. Flexibility: Visual journaling is a versatile tool that can be adapted to suit individuals with varying artistic skills and preferences. It accommodates diverse modes of expression, making it accessible to a wide range of clients in art therapy.
We’ve included a simple 7 day journaling project below. Note that this series of 7 days is primarily based on exploring some art ideas under the guide of art AS therapy and not art therapy. As these pages are not heavily therapy based, these exercises can be conducted at home.
Art as therapy has benefits that are purely driven by the act of creative expression while engaging in a relaxing activity. This is similar to watching a movie, taking a walk or reading a book. The act itself is therapeutic in that it transports us away from our daily stresses. During the activity, we may inadvertently experience emotional expression, understanding of ourselves, and moments of personal insight into problems, however, these outcomes are usually an unexpected by-product of the activity. In many cases, although, we experience these outcomes, we don’t know what to do with them once they surface.
DAY 1: SETTING THE FOUNDATION
If your client is experiencing times of distress outside of therapy, it is helpful for them to have a strategy in place to help alleviate the distress. This can include both mental strategies such as meditation, deep breathing, talking as well as physical self-soothing strategies such as creating art, journaling and engaging in comforting affirming activities.
Creating a portable kit will allow you to create art anywhere which is very useful when you find yourself with a significant amount of waiting time. While you may not be actively engaging in resolving psychological issues while waiting in the doctor’s office, creating art will help provide useful self-care techniques that can help reduce feelings of impatience.
Below are some recommended products to include in an art journal kit. Note: these products contain affiliate links to Amazon where we may earn a small commission on the sale of each product. The price you pay is not affected.
- Art Book Mix Media 5.5×8.5inch
- Watercolor Brush
- Faber Castell Big Brush Pen Black
- Gelly Roll Medium Black Pen
- Gelly Roll Medium White Pen
- Mixed Media Collage Paper Pad
- Word Stickers
- Elmers Glue Stick
- Black Stabilo Pencil
- Prima Marketing Water Soluble Crayons
- Angora Watercolour Pan Set
- Dr Martin Bombay India Inks
- Liquitex Acrylic Paint Set
- Loew Cornell Brushes
- Liquitex White Gesso
EXERCISE:
- Gather your art supplies for the next 7 days. You may wish to peruse the supplies mentioned above and gather any similar items that you have in your current supplies. Keep your choices simple if you don’t have access to many supplies.
- Use the first day to get familiar with your supplies. Open a page in your book and use it as a scratch pad to play with colours and different mediums in your supplies. Create marks, scribbles, patterns, or draw funny faces of expressions.
- Embrace the childlike nature of ‘play’ and the process of finding out what different art supplies do on the page. This session is about becoming familiar with your supplies as well as understand how the supplies interact with your journal.
- You may like to use our Visual Starter exercise as a prompt to play on your page. You can view the exercise, including a video on this blog post here.
- Give yourself at least 30 mins to play with your supplies. If time is limited, even 10 minutes can be beneficial.
DAY 2: EXPLORING COLOUR
Colour psychology explores the impact that colours can have on us through our senses. However, despite this research, there is a significant influence of personal preferences. Some may see red as representative of aggression or anger, while others may view it as representing energy and impact.
Additionally, the use of colour in art therapy can be more individually interpreted depending on specific moods on that day or experiences that the client is going through in their life at the time.
If they are experiencing grief over the loss of a loved one, they may see a specific colour as representative of their emotional state at that time, but may see the colour as representative of a joyful experience another time. The use of colour is a subjective experience and therefore no art therapy exercise can prescriptively explain the impact of colour. Instead, the use of colour in art therapy is a good opportunity to discuss emotions as the client explores each colour.
Clients can be encouraged to reflect on their current emotional state and choose colours that resonate with those feelings. For example, they might select vibrant and energetic hues to express happiness or choose muted tones for a sense of calmness.
Experiment with colour combinations to represent complex emotions or mixed feelings. Explore the layering of colours to convey the nuanced aspects of their emotional experiences.
EXERCISE:
- Take a few minutes to sit quietly before you start the exercise. You may like to sit with your eyes closed and use some breathing exercises. A great breathing exercise that can help regulate your breathing is the 4-7-8 method developed by Dr Andrew Weil. To undertake this exercise, inhale for 4 seconds, hold your breath for 7 seconds and exhale for 8 seconds. You may want to repeat this process for 4-6 times.
- Once you’ve finished your breathing exercise, ask yourself: How do I feel right now?
- As you entertain this question, look over your art supplies and see if an item or a colour grabs your attention. Would this colour represent how you’re feeling? If not, look over your supplies until you see a colour that represents how you feel right now. Maybe it’s 1 or 2 colours, or maybe it requires a rainbow of colour to express your mood. There are limits or rules – only what is instinctively sparking an idea for you.
- Grab those supplies and colours and begin to create some shapes on your page that reflects your current mood. This might be basic shapes such as square, rectangle, circle. It could be a combination of shapes or it could be shapes that morph in and out of other shapes.
- After you’ve finished creating, reflect on the colour choices you made. You may want to write some notes in a separate journal or on the same page to expand on the emotions you are feeling and the colours you chose to reflect those emotions.
- Give yourself at least 30 mins to play with your supplies. If time is limited, even 10 minutes can be beneficial.
DAY 3: SHAPES AND SYMBOLS
In art therapy, symbol formation is a powerful tool for expression. Clients often create symbols within their artwork that represent intricate emotions, complex relationships, or even deeply buried memories. Deciphering these symbols is a bit like deciphering a universal code of the human psyche. While the specific interpretation of symbols can be highly personal, some universal symbols have shared meanings, making the process of understanding art more accessible.
A symbol’s meaning depends on the context in which it is created and used. For example, a drawing of a house could represent a physical place or serve as a symbol of one’s self. Additionally, clients may use the same symbol to express completely different emotions that are contained or trapped as represented by the house. The meaning attached to the house is always relevant to the individual who uses the symbol in their art making.
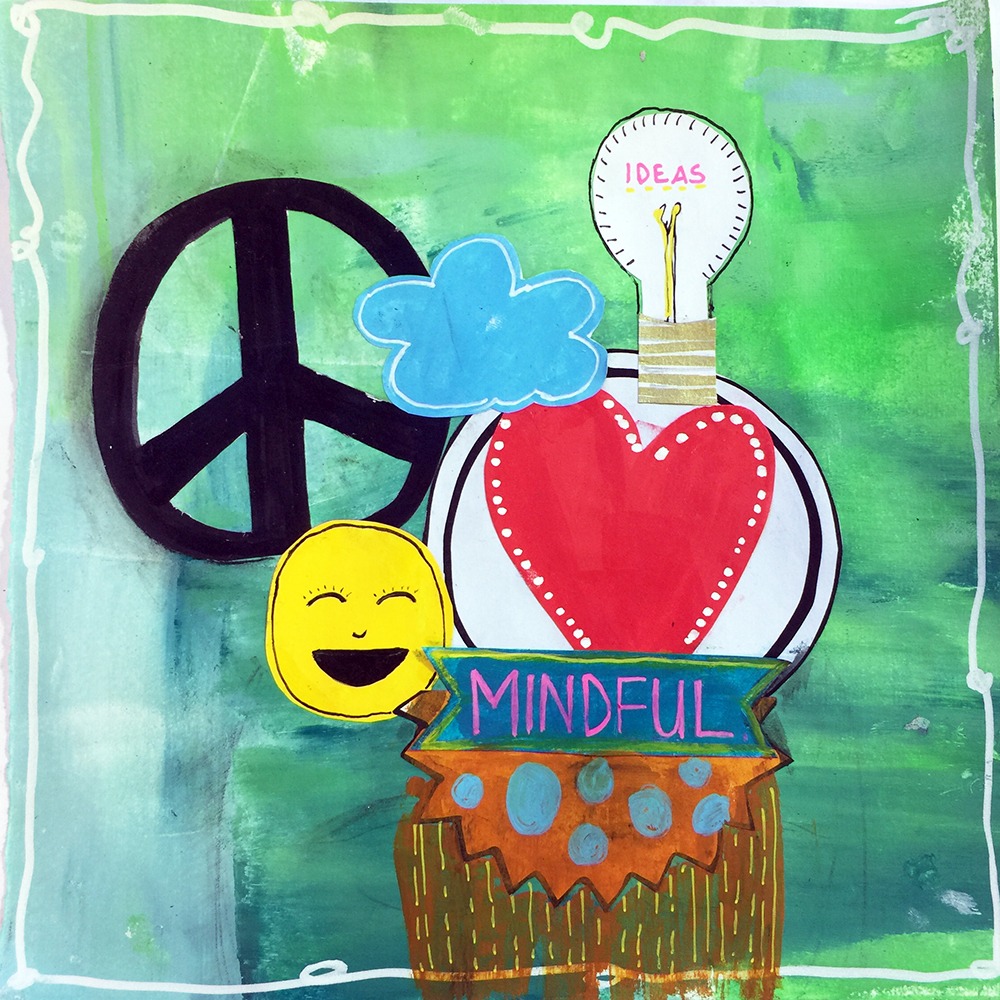
Much like colour, shapes and symbols can be used to reflect our internal thoughts and emotions. For example, we can use shapes to reflect confusion (squiggles), limits (boxes), infinite ideas (circles). Symbols can be used to also reflect our inner state. For example, a peace sign (calm), house (safety), water (depth of feeling). The options are endless and only limited by imagination.
As you create in your journal over the 7 days, you may notice that you use some symbols numerous times. This may spark a discussion on whether a reoccurring thought or idea is on your mind and warrants further exploration.
EXERCISE:
This exercise is based on the statement: I feel energetic and inspired to take action in life
- Create an art piece in your journal based on the above statement. Build on the exercise you did in day 2 by choosing colours by instinct. Think about shapes and symbols that you might want to use to process the shapes and symbols that come to mind as you read the statement: I feel energetic and inspired to take action in life
- You may want to create a random collection of symbols and shapes that represent various aspects of the statement, or you may want to create a scene or storyline on your page that speaks to the statement. The choice is yours as you delve into your reactions to the statement.
- After you’ve finished creating, reflect on the choices you made. You may want to write some notes in a separate journal or on the same page to expand on your thoughts.
- Give yourself at least 30 mins to play with your supplies. If time is limited, even 10 minutes can be beneficial.
DAY 4: TEXTURE
Creating art can help us explore many of our senses. One important sense that we can explore through art is touch where we can explore different art materials for texture.
Art plays an integral role in adding depth and sensory richness to visual journal entries. We can explore a variety of materials that can be employed to create texture, such as textured paper, fabric, found objects, or unconventional materials like sand or leaves.
We can encourage clients to experiment with the tactile qualities of different media, fostering an awareness of how texture can enhance the expressive potential of their visual narratives.
Some ways in which texture can be explored include methods like collaging textured materials onto the pages, using impasto techniques with paint, or employing embossing tools to create raised surfaces. Crafts items can be used to incorporate the softness of feathers or the roughness of sand.
Focusing on the sensation of these textures can be a meditative and immersive experience that helps us connect with the physical presence of our own bodies and how we feel when tension or other emotions occur in our lives.
Texture creates interesting parts of art and this concept can be extended to an understanding of our lives and the ‘texture’ that we encounter in life from various experiences
EXERCISE:
NOTE: If you’re creating your artwork in a journal, you may want to consider your choice of materials to include in this exercise so that your journal remains useable. If you prefer to use bulky textures that don’t suit a journal/book, you can create this exercise on a loose sheet of paper instead.
Like the exercise on colour, this exercise starts in a similar way:
- Take a few minutes to sit quietly before you start the exercise. You may like to sit with your eyes closed and use some breathing exercises. A great breathing exercise that can help regulate your breathing is the 4-7-8 method developed by Dr Andrew Weil. To undertake this exercise, inhale for 4 seconds, hold your breath for 7 seconds and exhale for 8 seconds. You may want to repeat this process for 4-6 times.
- Once you’ve finished your breathing exercise, ask yourself: How do I feel right now?
- As you entertain this question, focus on the idea of how you would describe this feeling in terms of ‘texture’. Examples of texture words include smooth, rough, grainy, slick, slippery, bumpy, furry, fluffy, reflective, matte, flat, velvety, silky, prickly, fuzzy, jagged, spongey, crackled, shaggy, crinkled…just to name a few! What texture would represent how you’re feeling? Look over your art and craft supplies until you see a texture that represents how you feel right now. If you cannot find an exact texture that feels like you do, then you may wish to draw something that represents that texture. For example, if you’re feeling prickly, you could draw a cactus – a literal translation of your feeling.
- Grab those supplies and begin to create some textures on your page that reflects your current mood. Your creation could simply be a collection of textures, or you could create a collage that depicts a story that explains the connection of your emotions to the feeling of texture.
- After you’ve finished creating, reflect on the choices you made. You may want to write some notes in a separate journal or on the same page to expand on the emotions you are feeling and the colours you chose to reflect those emotions. Questions could include “How does the arrangement of textured elements contribute to the mood of the piece?” or “In what ways does the artwork reflect your emotional state?”
- Give yourself at least 30 mins to play with your supplies. If time is limited, even 10 minutes can be beneficial.
DAY 5: COLLAGE
Art plays an integral role in adding depth and sensory richness to visual journal entries. We can explore a variety of materials that can be employed to create texture, such as textured paper, fabric, found objects, or unconventional materials like sand or leaves.
We can encourage clients to experiment with the tactile qualities of different media, fostering an awareness of how texture can enhance the expressive potential of their visual narratives.
Some ways in which texture can be explored include methods like collaging textured materials onto the pages, using impasto techniques with paint, or employing embossing tools to create raised surfaces. Crafts items can be used to incorporate the softness of feathers or the roughness of sand.
Focusing on the sensation of these textures can be a meditative and immersive experience that helps us connect with the physical presence of our own bodies and how we feel when tension or other emotions occur in our lives.
Texture creates interesting parts of art and this concept can be extended to an understanding of our lives and the ‘texture’ that we encounter in life from various experiences
EXERCISE:
NOTE: If you’re creating your artwork in a journal, you may want to consider your choice of materials to include in this exercise so that your journal remains useable. If you prefer to use bulky textures that don’t suit a journal/book, you can create this exercise on a loose sheet of paper instead.
Similar to the exercise on colour, this exercise starts in a similar way:
- Take a few minutes to sit quietly before you start the exercise. You may like to sit with your eyes closed and use some breathing exercises. A great breathing exercise that can help regulate your breathing is the 4-7-8 method developed by Dr Andrew Weil. To undertake this exercise, inhale for 4 seconds, hold your breath for 7 seconds and exhale for 8 seconds. You may want to repeat this process for 4-6 times.
- Once you’ve finished your breathing exercise, ask yourself: How do I feel right now?
- As you entertain this question, focus on the idea of how you would describe this feeling in terms of ‘texture’. Examples of texture words include smooth, rough, grainy, slick, slippery, bumpy, furry, fluffy, reflective, matte, flat, velvety, silky, prickly, fuzzy, jagged, spongey, crackled, shaggy, crinkled…just to name a few! What texture would represent how you’re feeling? Look over your art and craft supplies until you see a texture that represents how you feel right now. If you cannot find an exact texture that feels like you do, then you may wish to draw something that represents that texture. For example, if you’re feeling prickly, you could draw a cactus – a literal translation of your feeling.
- Grab those supplies and begin to create some textures on your page that reflects your current mood. Your creation could simply be a collection of textures, or you could create a collage that depicts a story that explains the connection of your emotions to the feeling of texture.
- After you’ve finished creating, reflect on the choices you made. You may want to write some notes in a separate journal or on the same page to expand on the emotions you are feeling and the colours you chose to reflect those emotions. Questions could include “How does the arrangement of textured elements contribute to the mood of the piece?” or “In what ways does the artwork reflect your emotional state?”
- Give yourself at least 30 mins to play with your supplies. If time is limited, even 10 minutes can be beneficial.
DAY 6: SELF-REFLECTION
Introspection and self-reflection are an important part of the visual journaling process. Reflective prompts are designed to stimulate deeper exploration of thoughts, emotions, and personal experiences.
Prompts can be open ended and encourage participants to approach them with a sense of curiosity and a willingness to delve into the layers of their inner thoughts and feelings.
You may want to consider various themes when working on self-reflection. Some topics to consider include: personal growth, relationships, challenges, dreams, or aspirations.
There is a symbiotic relationship between visual expression and written reflection. The act of writing can complement the visual elements and add depth to the self-explorative process.
Incorporating written responses within visual journal entries can take various forms, such as including written passages alongside visual elements, using calligraphy, or framing significant written reflections with artistic embellishments.
Writing can take various forms including stream of consciousness writing, free association, or structured responses. You may like to try different approaches or you may find one approach more suitable for you than another based on your personal journaling style.
EXERCISE:
A good exercise for this process of self-reflection was developed by artist Julia Cameron in the book The Artist’s Way. Julia created the idea of ‘morning pages’ where you sit down in the morning and write a stream of consciousness in your journal.
You can read more about the process of morning pages here: Morning Pages
Once you’ve created your morning pages, you can use art to cover up the pages. By covering up the pages, this provides you with an avenue to vent your inner most thoughts on to a page with the knowledge that they will be protected by what you create on top of them.
You can either set a timer with a set time limit of 30 minutes or an hour, or you can designate a set number of pages to write. Julia recommends 3 written pages in her morning pages process.
Write your stream of consciousness writing on your page/s.
Once you have finished writing, use your art supplies to cover up your writing. It is up to you how you choose to create art on top of your page. You can create without any preconceptions or you can choose to create art on top of your writing that transforms your writing in some way. For example, if your writing was sad you may wish to cover the writing up with bright and happy symbols.
DAY 7: WRAPPING IT UP
Now that the week has ended, you have journal pages that have presented as a true reflection of you over the week. This is a time you can look back over your pages and see if you can recognize recurring patterns, themes, or symbols that may have emerged in your artwork.
Perhaps you have noticed some personal growth and insights gained through the visual journaling process. Have your visual expressions evolved and has there been any noticeable shifts in your emotional awareness or perspectives?
Visual journaling is an excellent tool for self-expression, self-discovery, and emotional well-being. The cumulative effect of daily visual journaling contributes to a more nuanced understanding of one’s emotions, thoughts, and personal narrative. Visual journaling is a personal and evolving practice, and each entry contributes to a unique visual narrative that helps build an understanding of you and how you think and feel.
EXERCISE:
After reflecting on the pages that you have created over the past week, use this last page to create a summarised understanding of the insights you may have developed over the week. There may be a specific image in your mind that encapsulates your insights OR you may choose to create a variety of individual images that covers various things you may have discovered about yourself over the past few days.
FREE DOWNLOAD: Art Therapy Exercise
SIGN UP below to gain access to our RESOURCE LIBRARY and download the FREE 7 Day Journaling Plan.
BUILD YOUR ART THERAPY REFERENCE MATERIALS:
Pin this image to your Pinterest board.

SHARE KNOWLEDGE & PASS IT ON:
If you’ve enjoyed this post, please share it on Facebook, Twitter, Pinterest. Thank you!