THIS POST INCLUDES:
1. What is Evernote
2. Benefits of Using Evernote for Blogging
3. Create an Evernote Folder Structure
4. Create a Blog Template in Evernote
5. Create a Blog Workflow in Evernote
6. 10 Tips for Using Evernote
7. Free Download – Summary Notes for Blogging in Evernote
WHAT IS EVERNOTE
Evernote is a digital software program to collect and create content. Evernote can store all types of content including written, audio, video, images, pdfs. You can also create your own written content using many powerful features within Evernote including hyperlinking, checklists, formatting, reminders, voice memos, the table of contents creator and many more. Evernote is the ultimate content creation and storage system for all of your digital information.
With Evernote’s Web Clippers you can collect information from the internet and send it to your Evernote account. You can share documents both privately and publicly. Evernote is a web-based program so your data is synced and can be accessed across multiple devices at any time.
Evernote is based on the idea of creating notes (individual documents). You can also organise your notes into notebooks which are similar to folders. You can organise your notes according to a project, calendar system, or list of topics within a folder structure. Evernote also has useful planning features such as reminders and checklists.
In some of our blog posts, we have offered free Evernote downloads for worksheets and templates. These templates can be freely accessed by clicking the links in each post.
Here is a collection of some of the Evernote documents you can download. The FREE Evernote document can be found at the end of each blog post:
- Art Therapy Research Organisation Tips
- Social Media Schedulers
- Free Business Contact List
- Art Therapy Associations and Organisations
Evernote offer a Basic Account option that is free, however, you can also pay a subscription amount for additional premium features.
BENEFITS OF USING EVERNOTE FOR BLOGGING
Evernote has a number of benefits that will help you create and manage your written content for your blog, general website content, ebook content, or course creation content.
Below is a list of some of the benefits of using Evernote for blogging:
- You can use it anywhere with access across multiple devices such as your desktop, tablet or phone. You will need internet access to sync your data.
- Use the web clipper feature to save links, images and whole articles for reference. The web clipper has features that will help you saved your data in an organised form.
- You can scan your hand written notes and art therapy artwork and save it into Evernote through Evernote’s free app Scanable
- Organize notebooks according to your blogging workflow, eg. Idea collection, drafts, editing, published, structure by calendar or topic
- Share your notes with collaborators or editors to create and finalise your blog writing content
- Set up blog templates to use each time you create a blog post or standard written document for your practice
- Link your Evernote account to WordPress. (use IFTTT recipe, CoSchedule Plugin, or copy/paste your content)
CREATE AN EVERNOTE FOLDER STRUCTURE
One of the benefits of Evernote is the use of its organisational features. If you use Microsoft Word, you are limited to creating all of your blog content in one large document where your content is placed in one rigid order on a single document, or alternatively creating a multitude of various Word documents that require you to open and close each document every time that you want to write, edit, or access your content. Having multiple files can create a lot of excessive work for you in managing files and backups, in addition to being limited to accessing your content on one device.
Your Evernote account is like carrying a filing cabinet around with you only in a digital format. Your information can be stored however you like to structure your content whether it be many or a limited number of individual notes.
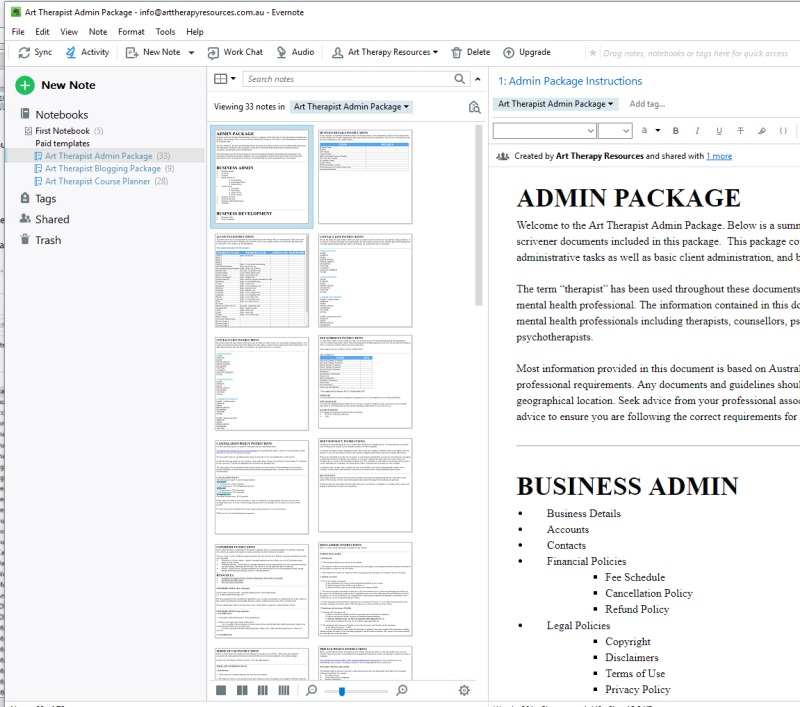
Below is a folder structure of the various Evernote Admin Package we sell in the store:
You can see there are 3 panels in the image below:
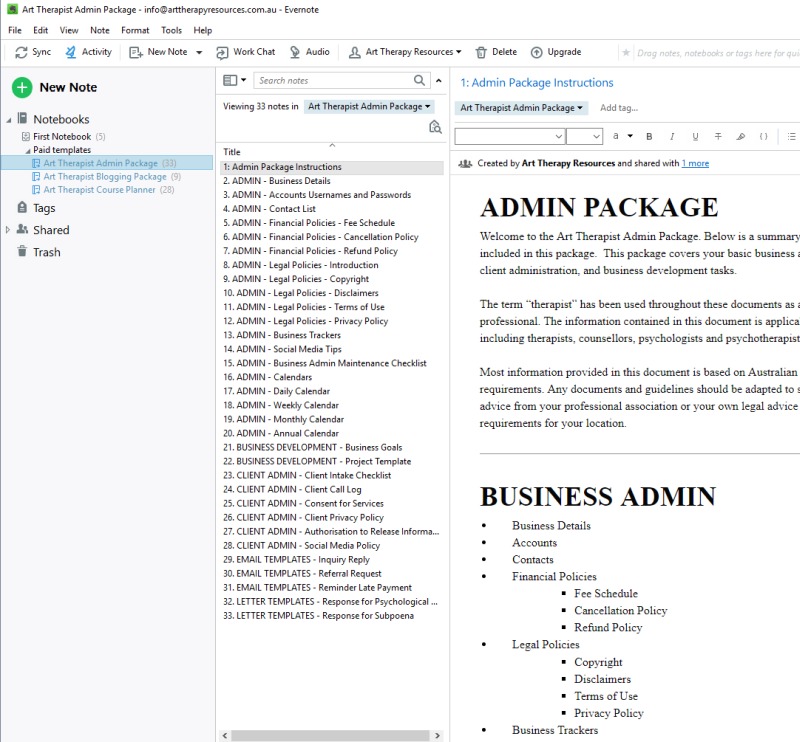
- PANEL 1: The notebook view showing all of the available notebooks
- PANEL 2: The individual list of notes
- PANEL 3: Contents on the first note
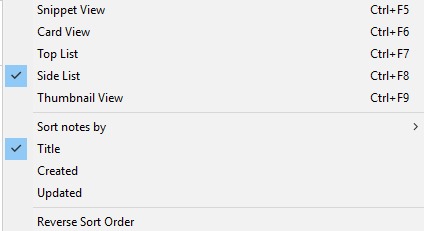
The image above shows 3 panels of information, however, Evernote allows you to manage the way your notebooks are viewed. The below image shows the available options. As you can see in the above image we’ve shown the left panel, note list and note panel.
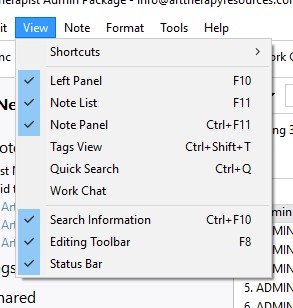
If you want to maximise your writing space, you can deselect the left panel and note list to not show and be left with only your notes showing.
Evernote also allows you to change the way you view your content. For example, the above same image can also be viewed where the individual notebook names are shown as thumbnail as shown below:
You can view your notes in the following formats:
- Snippet View
- Card view
- Top List
- Side List
- Thumbnail View
An example structure you might want to use for your blogging content is included below:
The words written in bold are considered NOTEBOOKS and the individual dot points are considered notes.
BLOG ADMIN
- Master list of blog content ideas
- Master content calendar schedule
- Miscellaneous content for blog post ideas – images, reference materials etc. A place to store unorganised content that can be used and organized into structured blog posts later
- An original blog post template to copy for each blog post created
- A checklist for each blog post for creation, editing, and publishing
IN PROCESS – Individual blog posts for each topic
- Blog Topic 1 – research materials and draft content
- Blog Topic 2 – research materials and draft content
- Blog Topic 3 – research materials and draft content
- ….continue
PUBLISHED
- Blog Topic 1 – research materials and draft content
- Blog Topic 2 – research materials and draft content
- Blog Topic 3 – research materials and draft content
- ….continue
CREATE A BLOG TEMPLATE IN EVERNOTE
One of the most efficient ways to use Evernote for creating blog content is to establish templates. You can use one master blog template or create a variety of templates based on the type of blog posts you create, eg. Book reviews, top 10 lists, art therapy exercises etc.
Templates can help you streamline your blog writing process and eliminate repetitive tasks in creating your blog post outline and formatting.
You can create your own templates to use, or alternatively, you can import templates that other Evernote users have created. You can also edit an imported template for any tweaks you have that relate to your writing.
These articles from the Evernote blog will help you learn more about the benefits and steps to create and import your own templates:
Evernote offers some FREE templates that you can import into your own Evernote account below:
In addition to creating your template/s for your blogging content, you can also create a checklist to follow for each blog article that you create. A checklist can help improve your productivity by providing specific steps for you to complete for each post as well as ensure you are including important information in each post to help it be more internet friendly for effective SEO.
EXAMPLE CHECKLIST:
- Plan blog post
- Outline blog post
- Draft blog post
- Edit blog post
- Format blog post
- Include internal and external links
- Include images
- Schedule / publish blog post
- Preview blog post on website for potential formatting issues
- Format for SEO (eg. Use free Yoast plugin in WordPress)
CREATE A BLOG WORKFLOW IN EVERNOTE
Creating a workflow can help you outline your task process and identify and remove any unnecessary steps in your blogging process. You can also modify the steps or reorder them to help you work more efficiently. Workflows also help you identify the resources you need to complete a task.
Workflows typically follow a sequential order that help you set up the necessary steps to complete the next task without significant disruption in time or resources.
If you’re new to Evernote or already use Evernote and want to start using it for writing your blog content, we’ve included a handy workflow guide below to start your Evernote blogging process.
- Set up your Evernote Notebook Structure according to your preferred organisation structure. Eg. by year > month or by topic
- Set up Evernote Master Note containing all blog content ideas. Organise into topics and categories as much as possible. Setting up this document will help you see the common threads in your blog posts and help you create your blog post template/s
- Set up a blogging template or multiple templates to help you include essential criteria such as format, word count, SEO. You can use one master blog template or create a variety of templates based on the type of blog posts you create, eg. Book reviews, top 10 lists, art therapy exercises etc.
- Create a new note for each blog post using your blog template/s
- Start creating your blog content. You can use the example checklist above to create your blog content
- Plan blog post
- Outline blog post
- Draft blog post
- Edit blog post
- Format blog post
- Include internal and external links
- Include images
- Schedule / publish blog post
- Preview blog post on website for potential formatting issues
- Format for SEO (eg. Use free Yoast plugin in WordPress)
10 TIPS FOR BLOGGING IN EVERNOTE
- Create a notebook/folder structure to organise your content
- Create a blog schedule
- Create a blog template
- Create a blog workflow using Evernote eg. Idea collection, drafts, editing, published, structure by calendar or topic
- Work in batches where possible. Eg. Create all blog post templates for a month at a time including blog title and general layout.
- Include a checklist at the top of each Evernote blog post note to ensure you have covered all essential parts of your blog post layout and content.
- Use web clipper to save research material from the internet
- Scan handwritten notes and artwork directly into Evernote
- Use your allocated Evernote email address to email items directly into your Evernote account
- Send Google Alerts to your Evernote account to review later. Read tips in our previous blog post How To Keep Up To Date On Art Therapy Research
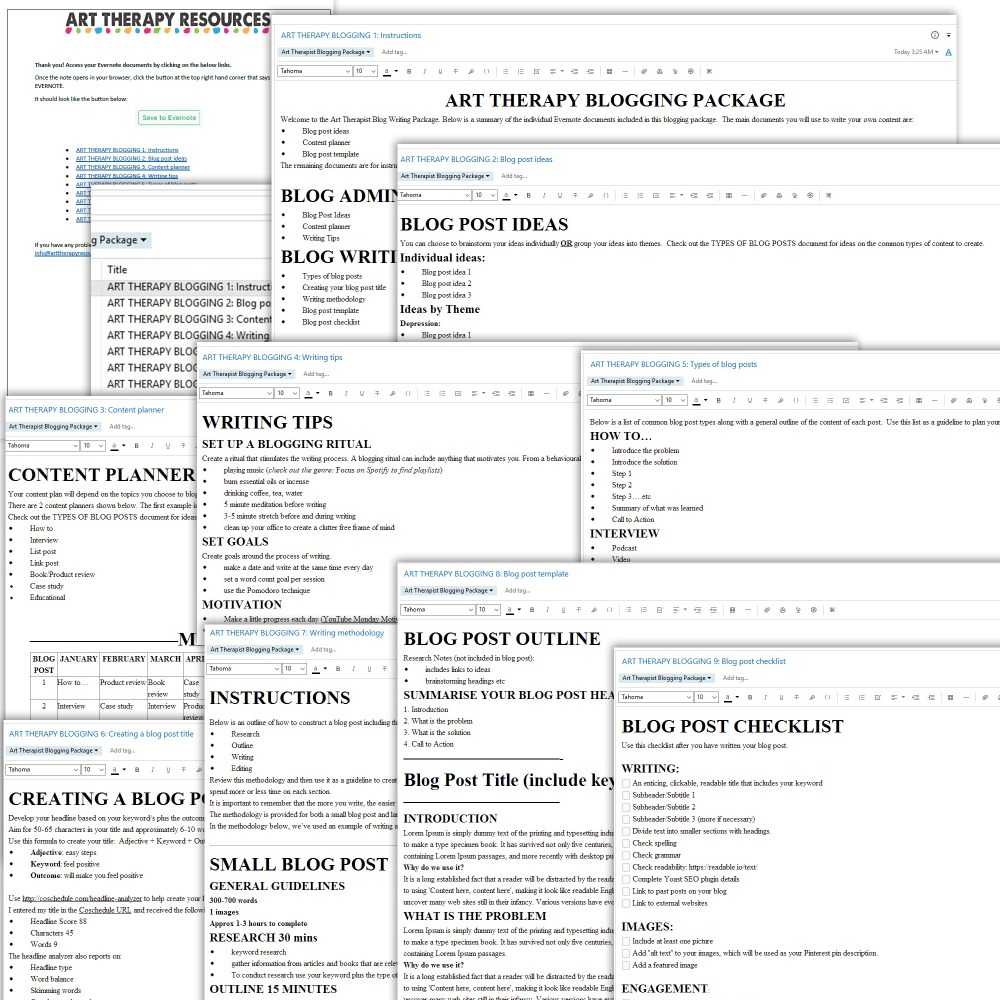
If you need help to develop your blogging content, we have an Evernote Blogging Package available in the store. Below is a snapshot of the content within the Evernote Blogging Package. You can find more details on each package on the website here: Evernote Blogging Package
Art Therapist Blogging Package
Using the resources in this package makes the process of blogging so much easier. It will save hours of wasted time trying to construct the perfect blog layout.
After working through this package you will:
- have a clear understanding of the best approach to plan for your blogging content
- easily construct your own content planner for the year (or use our suggested planners)
- create the most effective title for your blog post
- create your blog content using our step by step blog post template
- review your blog post using our blog post checklist
This product purchase is a collection of Evernote documents to be saved in your Evernote program.
The contents of this package include the following sections:
BLOG ADMIN
- Blog Post Ideas Worksheet
- Content planner
- Writing Tips
BLOG WRITING
- Types of blog posts
- Creating your blog post title
- Writing methodology
- Blog post template
- Blog post checklist
You can learn more about Evernote and it’s many uses from our previous posts:
FREE DOWNLOAD: Evernote Summary
DOWNLOAD EVERNOTE SUMMARY OF BLOGGING WITH EVERNOTE TIPS
You can download a summary list of the useful links and tips for using Evernote for Blogging. You can save this note to your own Evernote. You can view the Evernote document even if you do not use Evernote.
BUILD YOUR ART THERAPY REFERENCE MATERIALS:
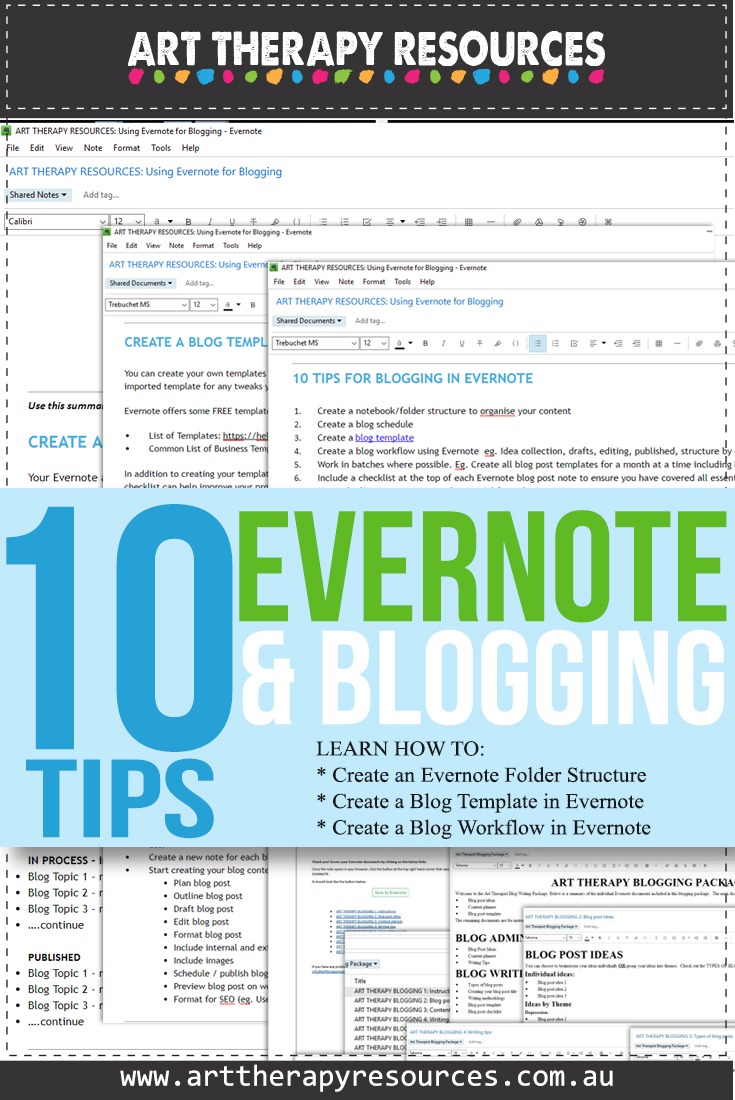
Pin this image to your Pinterest board.
SHARE KNOWLEDGE & PASS IT ON:
If you’ve enjoyed this post, please share it on Facebook, Twitter, Pinterest. Thank you!


