THIS POST INCLUDES:
1. Blog software options
2. How to choose your blog software
3. Create a Blog workflow
4. Free Download Website Layouts Guide
BLOG SOFTWARE OPTIONS
As the internet becomes an everyday part of our lives, it is essential for a business to have a website. With this increase in demand for business websites, technology companies have realised the need for businesses to have access to tools that help them overcome any technological hurdles when creating their website.
The most common features of a therapist website include:
- Booking system for appointments
- Ecommerce store
- Content management system (CMS)
This blog post focuses on the last common feature listed above – the content management system. A CMS is a software platform that enables users to create and manage a website without the need for understanding complex programming skills.
It’s important to understand the difference between a website and a blog as they are not the same thing. At its basic level, a website is a collection of pages. Those pages are typically a home page, an about page, and some general educational pages depending on your website purpose.
These simple pages are the most basic level that a website should contain if your website is created to showcase your private practice details and a little information about you and your services. For the most part, these basic pages of your website are set up once when you create your website, and then they don’t change until you want to add any further information. For example, you might want to update your practice hours, location, or pricing structure.
You can then decide to enhance the purpose of your website by adding more features including a blog. A blog is an evolving part of your website that is regularly updated for new content. For a therapist, this content is usually related to mental health issues and represents a way in which you can stay connected with your readers.
HOW TO CHOOSE YOUR BLOG SOFTWARE
Choosing software to use for your website and subsequent blog is a decision you should make based on your individual needs. Your criteria is personal to your needs. Some of the most important criteria to consider in your decision making includes:
- Installation process
- Easy to use with a low learning curve
- Features that suit your requirements
- Security of your website and its content
- Pricing within your budget
- Regular updates for future growth
There are many blog software options available, however, to keep this article as simple as possible, we’re limiting our list to just 5 options below:
The options vary in how much control and ownership you have over your content. Some options provide you with limited functionality within the options of themes and core features involving design etc. Other options provide you with complete control over the functions you can use including being able to code your features if you want.
Software such as Wix provides you with limited control, however, they focus on providing you with a simple process to create a website and blog so that you’re not overwhelmed with choices. Other options like WordPress.org offer you unlimited flexibility in creating a website and blog, however, this can sometimes mean you have to do more work in setting core functions up.
For those software options that provide easy to set-up features, they may require that you show some of their branding as part of your website. For example, with the choice of WordPress.org or WordPress.com, WordPress.org lets you have complete flexibility and your website address would be arttherapyresources.com.au whereas WordPress.com provides some limitations and your website would look like arttherapyresources.wordpress.com For some of the options that incorporate their branding, you can usually pay an upgraded price to remove these branding aspects.
The details of each option are numerous, so we’ve included some relevant blog posts from other websites that provide detailed analysis of each platform:
As this article in Hubspot recommends, your most important criteria to consider when choosing a program include:
- Editing capabilities
- Themes and templates to use
- SEO features and tools
- Extensions and integrations
All of these factors will help ensure you can manage your blog easily and efficiently while also paying attention to important technology requirements.
CREATE A BLOG WORKFLOW
A workflow helps you establish the steps you could undertake to manage creating blog posts. An effective workflow becomes a repeatable process so that all of the steps in the workflow are started and completed as efficiently and quickly as possible.
For blog writing, a typical workflow will include the following processes:
- Planning
- Content writing
- Images
- Marketing – hashtags, keywords
- Scheduling
Creating a workflow for your blog writing helps to establish good time management practices. It also provides a methodical breakdown of a task so that you can delegate the task to others in the future.
Creating a workflow can help you outline your task process and identify and remove any unnecessary steps in your blogging process. You can also modify the steps or reorder them to help you work more efficiently. Workflows also help you identify the resources you need to complete a task.
Workflows typically follow a sequential order that helps you set up the necessary steps to complete the next task without significant disruption in time or resources.
We’ve written about the process of blogging before in the context of using Evernote as a writing tool. You can see that blog post here: 10 Useful Tips to Use Evernote for Blogging
Included in that post are some tips on creating a blogging workflow using Evernote. These tips are applicable to the process of publishing a blog no matter what software you use to write your blog content.
Below is a handy workflow guide below to start your blogging process:
- Set up a blogging template or multiple templates to help you include essential criteria such as format, word count, SEO. You can use one master blog template or create a variety of templates based on the type of blog posts you create, eg. Book reviews, top 10 lists, art therapy exercises etc.
- Start creating your blog content
- Plan blog post
- Outline blog post
- Draft blog post
- Edit blog post
- Format blog post
- Include internal and external links
- Include images
- Schedule / publish blog post
- Preview blog post on website for potential formatting issues
- Format for SEO (eg. Use free Yoast plugin in WordPress)
FURTHER READING
For additional blog posts on the topic of blogging, please visit the below links:
Link List: 10 Blogging Tools to Boost Your Content Writing Productivity
10 Useful Tips to Use Evernote for Blogging
Also check out our Blogging Packages we have available in the store:
If you want to start blogging or want to increase your blogging productivity, the blogging package is for you.
The package provides the foundations of the most common type of blog posts that would suit a therapist. Once you’ve selected your type of blog post, you can use our step-by-step formula to create your title and blog post content.
Using the resources in this package makes blogging so much easier. It will save hours of wasted time trying to construct the perfect blog layout.
If you are procrastinating and avoiding creating blog content, this package will help keep you on track for more productive writing.
The package contains actionable advice to help improve your blogging process and create more blog content.
The package contains quick and practical advice that can easily be implemented to help you start creating blog content immediately.
After working through this package you will:
- have a clear understanding of the best approach to plan for your blogging content
- easily construct your own content planner for the year (or use our suggested planners)
- create the most effective title for your blog post
- create your blog content using our step-by-step blog post template
- review your blog post using our blog post checklist
FREE DOWNLOAD
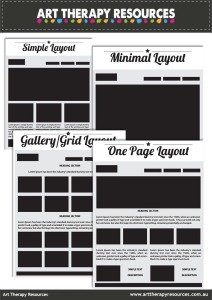
SIGN UP below to download the FREE Website Layouts Guide for suggested ideas of designing your website content layout.

BUILD YOUR ART THERAPY REFERENCE MATERIALS:
Pin this image to your Pinterest board.

SHARE KNOWLEDGE & PASS IT ON:
If you’ve enjoyed this post, please share it on Facebook, Twitter, Pinterest. Thank you!
